DK421 Hardware
This afternoon I was without anything to do when I remembered my DK421 project, which had been shoved off into a dusty corner of my hard drive. I didn't feel like programming any, and wouldn't know what to do or add anyway, so I got into the hardware side of it.
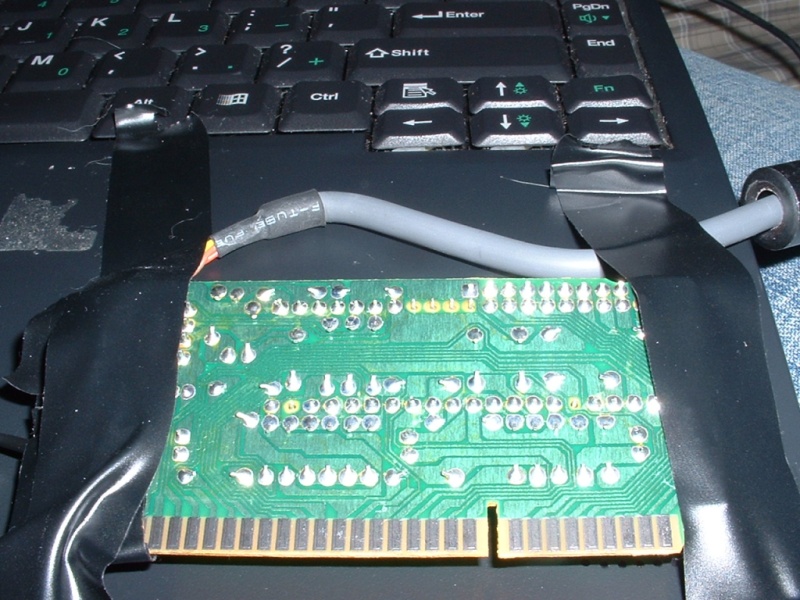
I dug into Stephanies old room and found the keyboard from the green dinosaur, an Acer computer from the early-90's. Anyway, I found it, took it to my room and cracked it open. Very simple device really. The keypresses are captured by switches composed of two sheets of plastic, very similar to slide-projector transparency sheets, with tracing on them. When you press the key it compresses a rubber bubble in a sheet and smashes the air, and thus the switch, down and completes the circuit. These connections go to a board with some leds and a chip for translating them into whatever goes down that PS2 cable.
I imagine that a newer keyboard might be more complicated, at least if it's usb. Maybe not though. I only have so many keyboards to rip open.
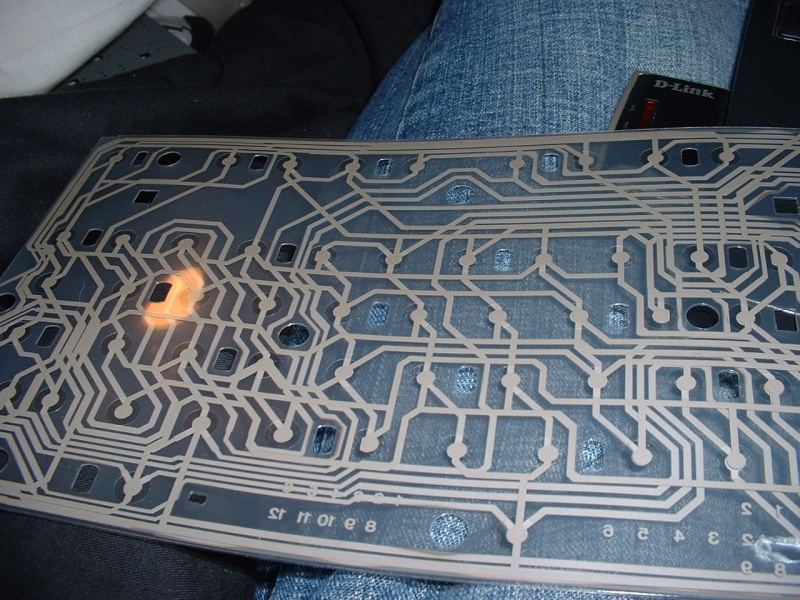
Following the tearing apart of the keyboard I hooked it up to my old gateway laptop (it's the computer I care the least about) and fired it up. No lights, no response. I shut it back down and figured out that I hadn't reconnected a little black ground that had been hooked onto the metal mounting board as well as one of the pins. If you look at the picture of the transparency-stuff circuit you can see that one pin is connected only to a big spot for the ground.

I taped it up and got it working right off the bat. Shiny. I then taped it onto the laptop in the lovely testing position illustrated here. I got a piece of thick copper wire, off of an old power supply, and generously stripped the ends (okay, my father did for me), 1.5" at least, then coiled each end around a long finishing nail (that's what it said on the box) and taped it up. This made for a nice, easy to control point-to-point connector for me.
With my newly created tool I fired up VIM and started shorting the pins together to see what they wrote. Okay, thats not true. First I tried tracing individual keys on the transparent stuff, but that got old real fast. It is, however, necessary for finding keys like shift. Regardless, I tried out the good old hunt and peck method, and soon had a list with more than enough keys for the drum triggers. I then tried out the shift key with a piece of spare wire, it works great. Thats an important one, because it is needed for the high-hat pedal.

Well, thats enough for now. Hopefully the pictures shed some light on the matter if it's still fuzzy. I haven't made up my mind on what to build the triggers out of. I almost want to go the air pressure route so the switches won't wear out to fast. I'll also have to consider how to build and mount all this, I'm thinking PVC at this point. Off to a good start though :)
Additional Photos